Whitelisting IP addresses or Domain
Who can use it?
The whitelist panel appears only for Admin‑role users on the Growth or Business plan.
-
Navigate to your endpoint page and click on the
Configurebutton to land on the Configure Endpoint modal. -
You will be able to whitelist by
DomainorIP Addressunder theAccess Listsection.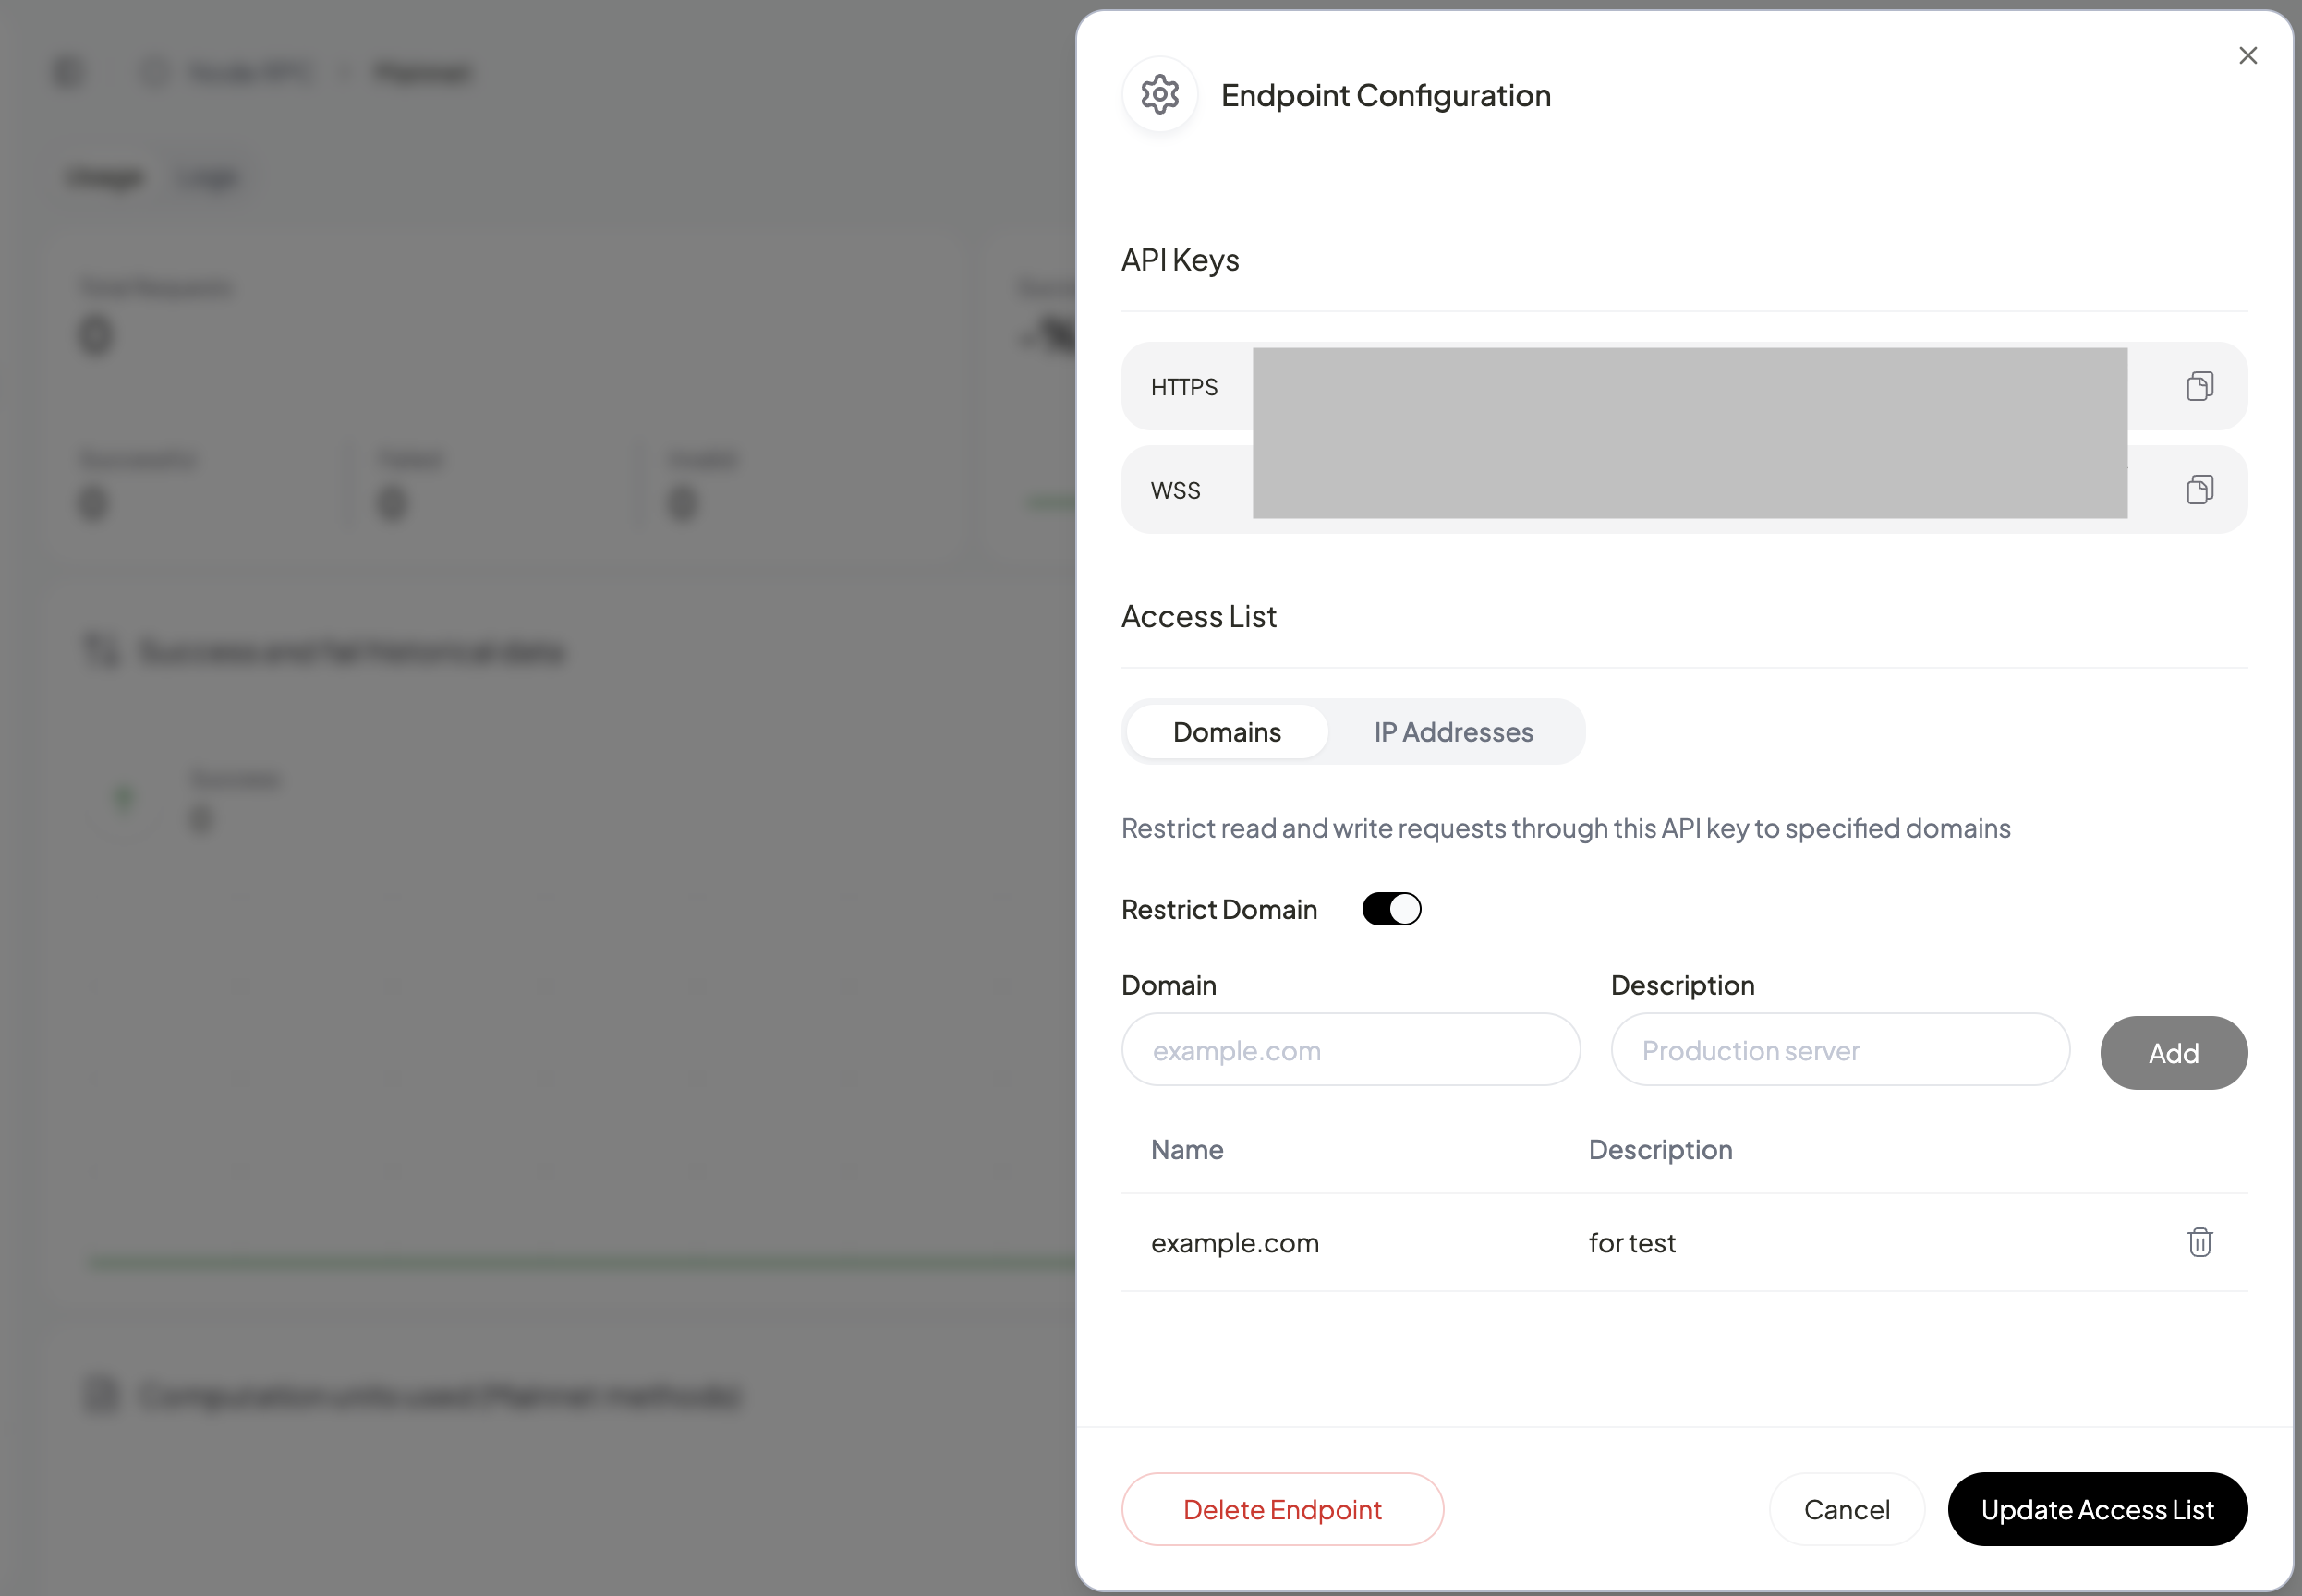
-
Once you have whitelisted the domain or the IP address, click on
Update Accesslist. You will be able to see the whitelist under input boxes listed.
Updated 29 days ago